Add Planned Visit: verschil tussen versies
Uit Manual Ident2be
| Regel 51: | Regel 51: | ||
</li> | </li> | ||
| + | </ul> | ||
| + | == How To Add New visitor == | ||
| + | <ul> | ||
| + | <li> | ||
| + | <strong>visit Info Tab</strong>: Fill in the details for the entire group of visitors. This includes selecting the member being hosted (start typing the member's name to see matching results), the date and time of the visit (required), selecting the days the visit will be valid, and specifying the location. . | ||
| + | </li> | ||
| + | <li> | ||
| + | <strong>visitor info Tab</strong>: Enter the individual information for each visitor, then click "Save" to store the visitor details. Finally, click "Create Visit" to complete the process and create the visit with all the added visitors. . | ||
| + | </li> | ||
</ul> | </ul> | ||
== Summary == | == Summary == | ||
This page is essential for scheduling planned visits with specific members, ensuring that all necessary details are captured and that visitors have a seamless experience when arriving at the company. | This page is essential for scheduling planned visits with specific members, ensuring that all necessary details are captured and that visitors have a seamless experience when arriving at the company. | ||
Versie van 25 aug 2024 om 21:34
Inhoud
Add Planned Visit Page
The Add Planned Visit Page is designed to schedule and manage planned visits to the company. This page includes two tabs: one for Visit Info and another for Visitors. Below are the detailed elements for each tab:
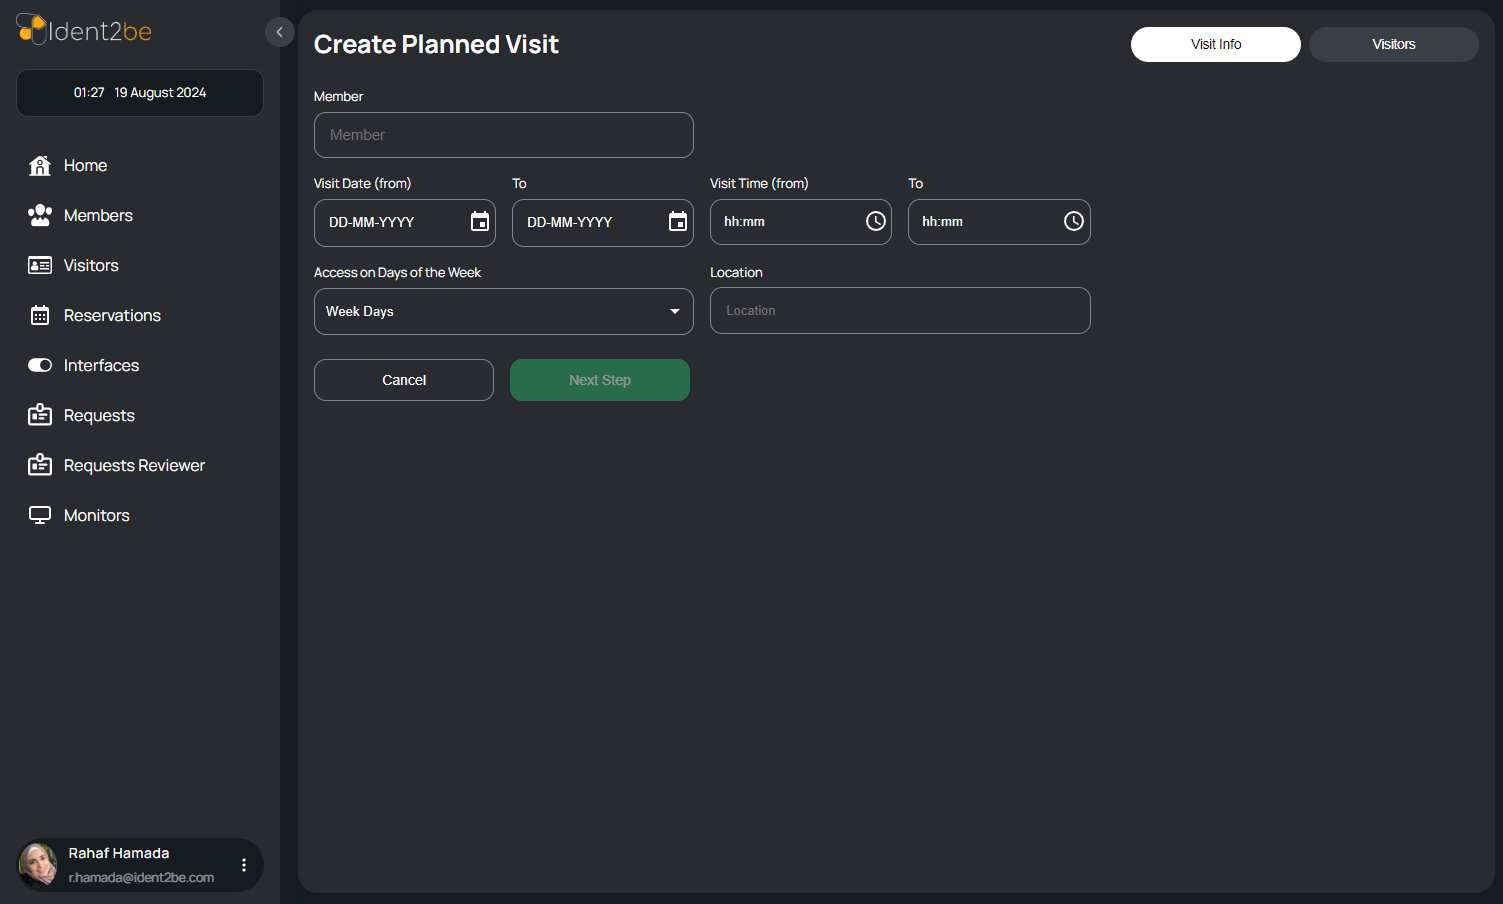
Visit Info Tab
This tab allows users to input and configure the basic details for a planned visit.
- Member Selection: A dropdown menu where users can select the member who will be hosting the visit. This ensures that the visit is properly associated with a specific company member.
- Visit Date (From - To): Two date pickers that allow the user to set the start and end dates for the planned visit. This is crucial for defining the visit's duration.
- Visit Time (From - To): Two time input fields to specify the exact time frame of the visit on the chosen dates. This helps in managing time-sensitive visits.
- Access on Days of the Week: A dropdown menu where users can select specific days of the week on which the visit is allowed. This option provides flexibility for recurring visits or those restricted to certain days.
- Location: An input field where users can specify the location of the visit. This helps in directing visitors to the correct place within the premises.
- Navigation Buttons:
- Cancel Button: A button to cancel the current operation and return to the previous page or menu.
- Next Step Button: A button that allows users to proceed to the next tab or step after filling in the required information.
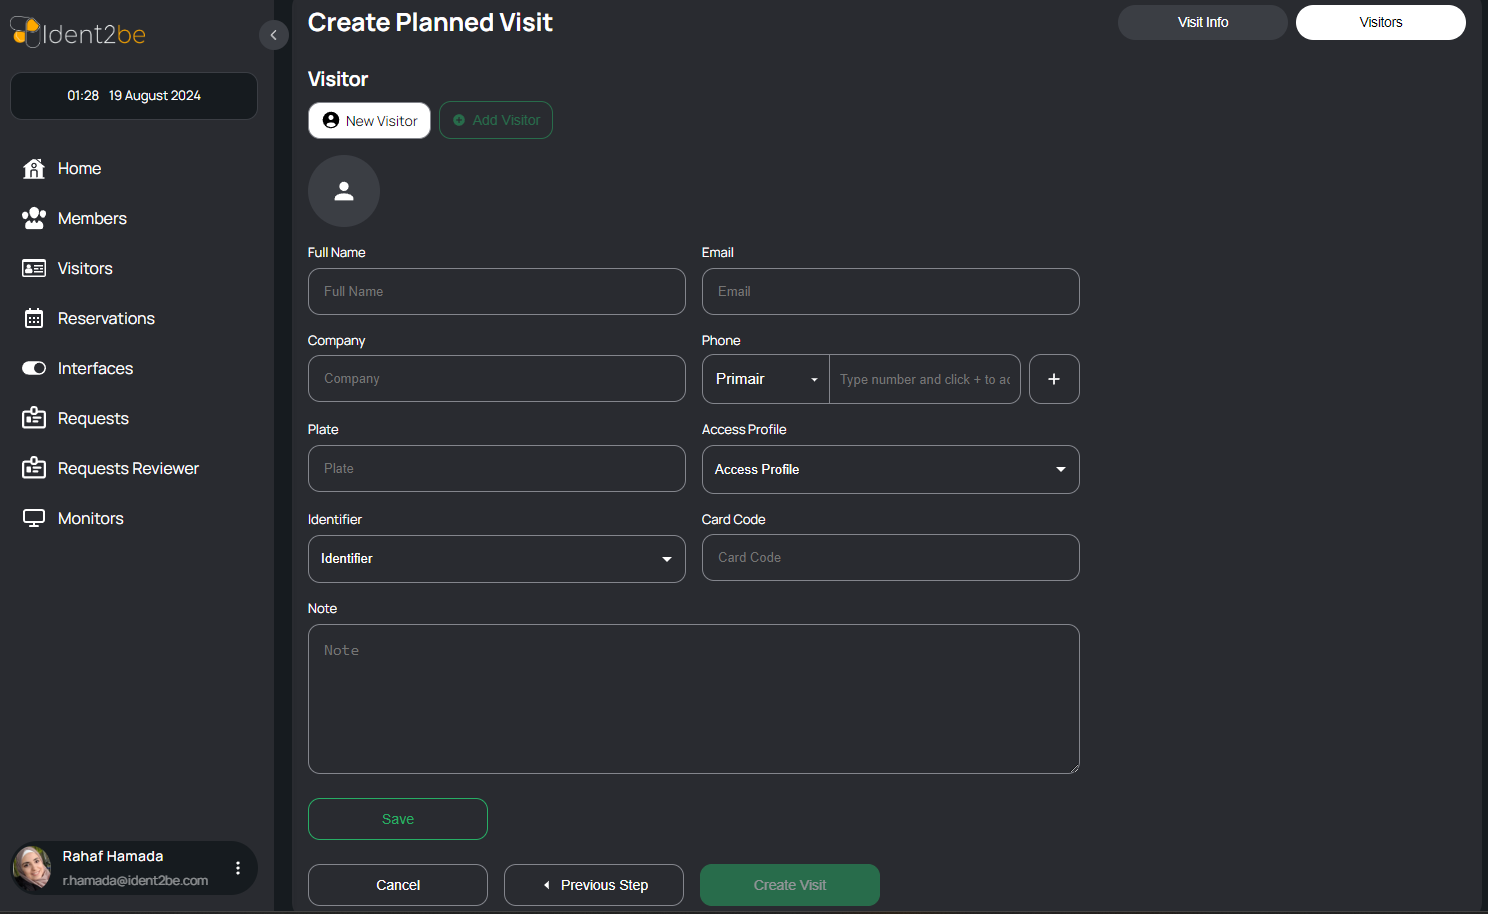
Visitors Tab
This tab allows users to add visitor details for the planned visit. After configuring the visit's basic information, users can proceed to this tab to input the details of the visitors.
- Visitor Information: Fields to input essential visitor details, including name, company, contact information, and any specific instructions or notes related to the visit.
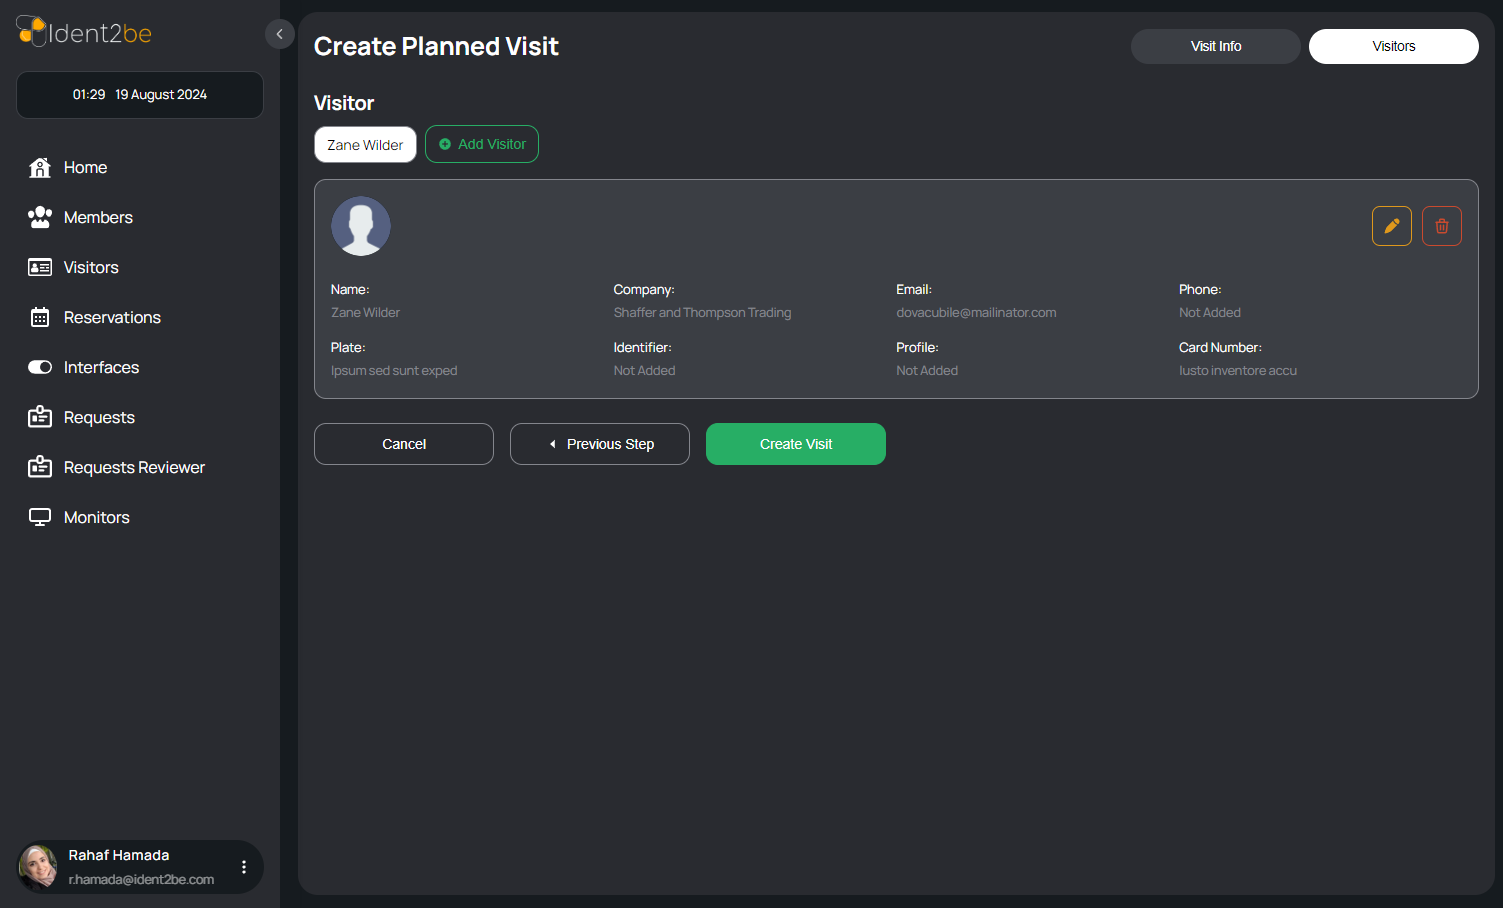
- Add Visitor: An option to add one or more visitors to the planned visit, ensuring that all intended attendees are accounted for.
- Visitor List: A dynamic list that displays all visitors added to the visit. Users can edit or remove visitors from this list as needed.
How To Interact With visitors Actions
- Add visitor Button: Press it to go to the add visitor page to add new visitor.
- open button : Press on open button from visitor's row To open gate for specific visitor ( the visitor status will change automatically.
- Assign card : Press on assign card icon on visitor's row to assign card for hem .
- Open gate : Press it to open gate for non specific visitor .
How To Add New visitor
- visit Info Tab: Fill in the details for the entire group of visitors. This includes selecting the member being hosted (start typing the member's name to see matching results), the date and time of the visit (required), selecting the days the visit will be valid, and specifying the location. .
- visitor info Tab: Enter the individual information for each visitor, then click "Save" to store the visitor details. Finally, click "Create Visit" to complete the process and create the visit with all the added visitors. .
Summary
This page is essential for scheduling planned visits with specific members, ensuring that all necessary details are captured and that visitors have a seamless experience when arriving at the company.


