New Request: verschil tussen versies
| Regel 48: | Regel 48: | ||
<ul> | <ul> | ||
<li> | <li> | ||
| − | <strong>Select Request Type </strong>: Choose whether the request is for a member or a non-member. If it's for a non-member, you must assign a responsible member for the request | + | <strong>Select Request Type </strong>: Choose whether the request is for a member or a non-member. If it's for a non-member, you must assign a responsible member for the request ,when you choose none member you will have pop up to select the responsible member ( (start typing the member's name to see matching results) . |
</li> | </li> | ||
<li><strong>personal info </strong> Enter all the required personal information in this tab | <li><strong>personal info </strong> Enter all the required personal information in this tab | ||
Versie van 25 aug 2024 om 22:25
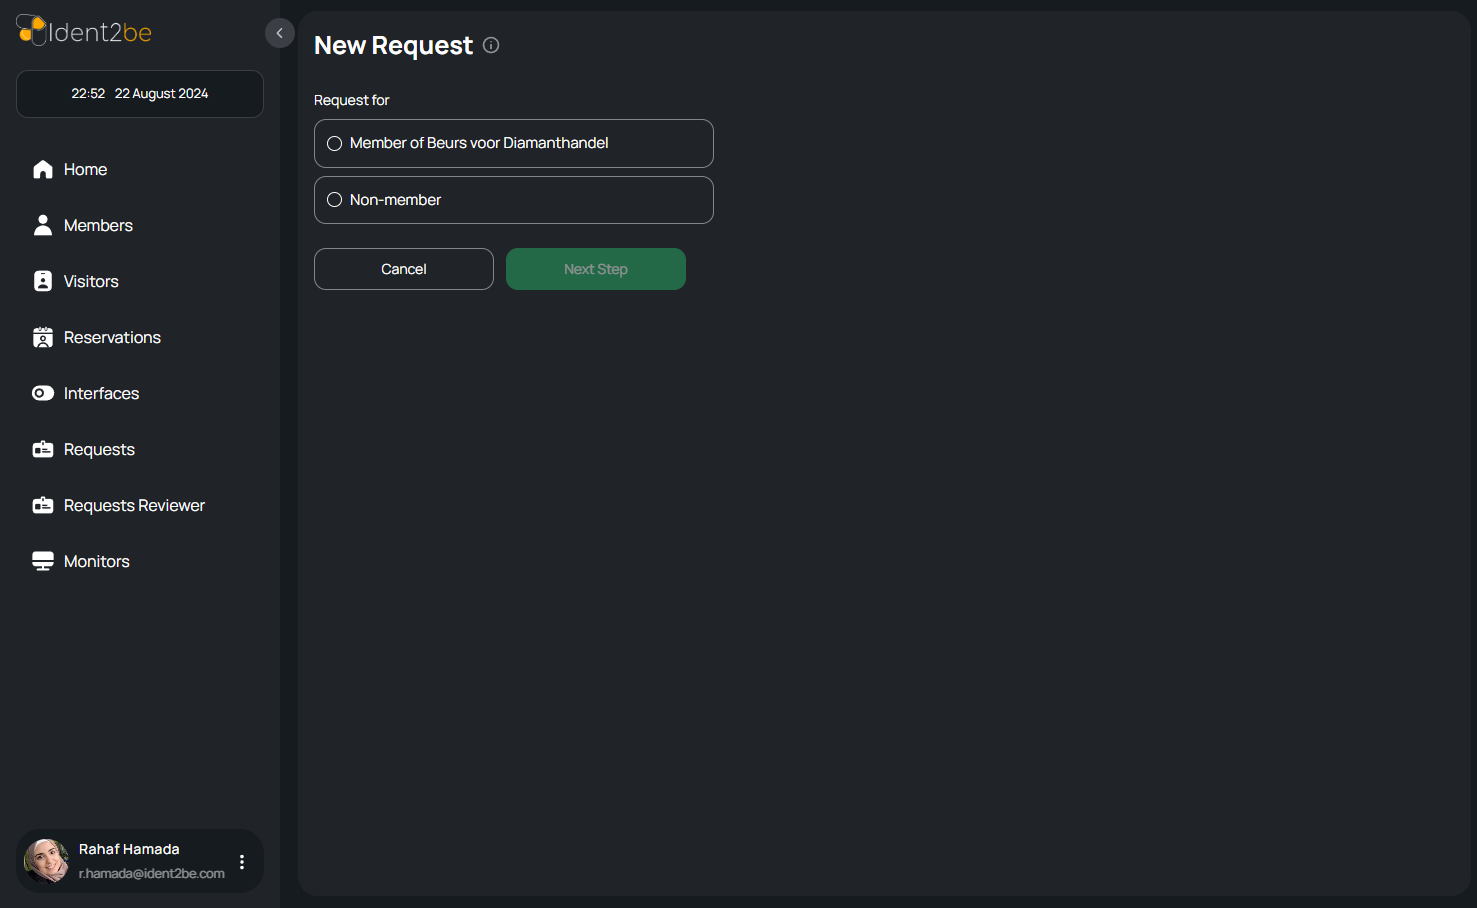
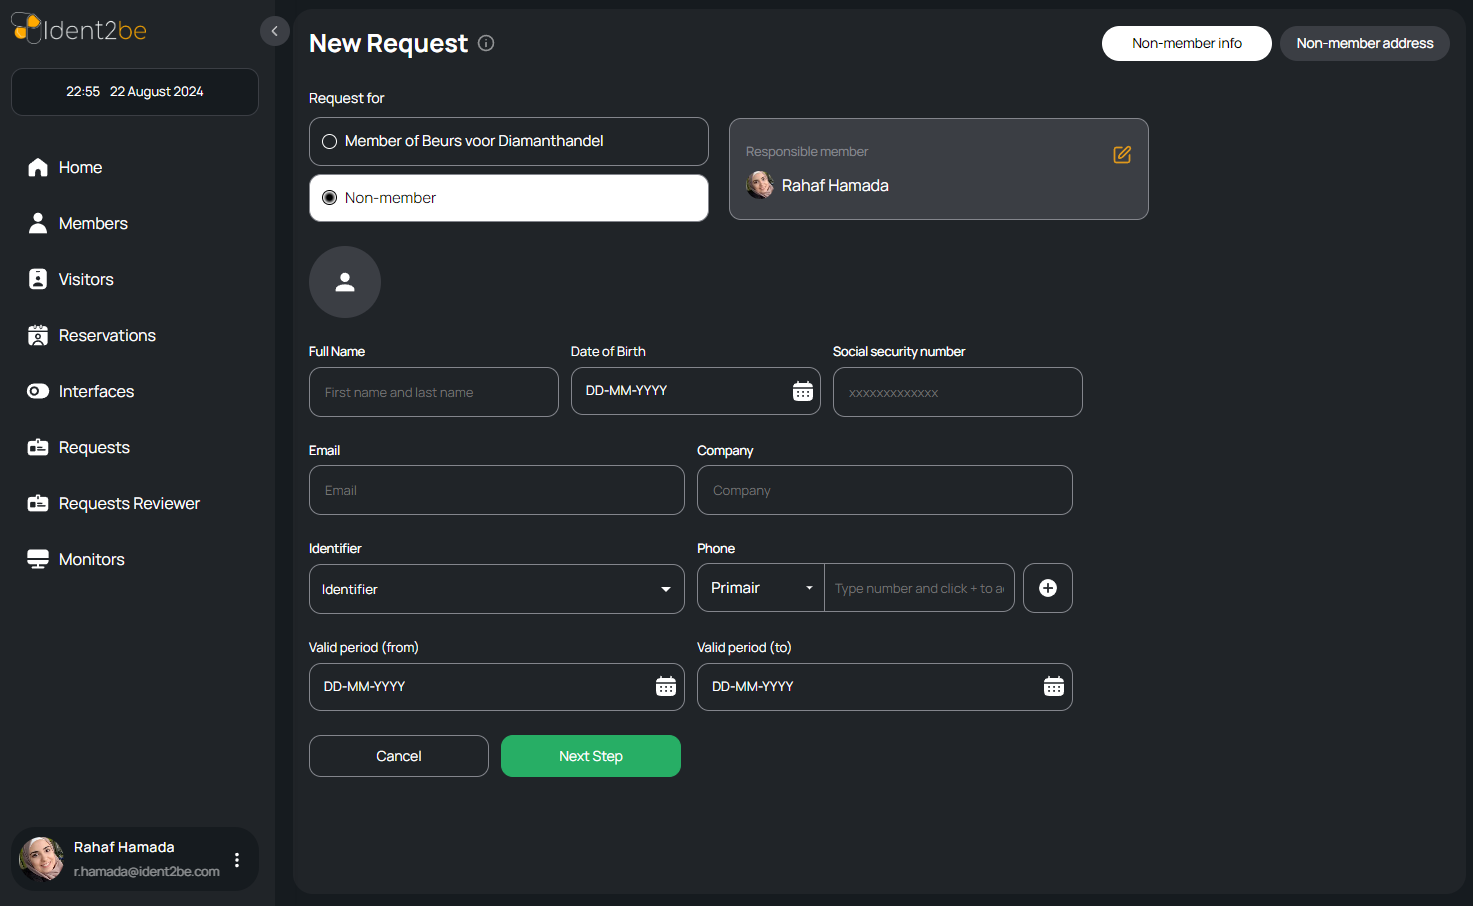
The New Request Page is a crucial feature that allows users to create requests for either members or non-members. This page is designed with a two-tab structure to capture all necessary details depending on the selection. When a member is chosen, the user is directly redirected to the "Personal Info" tab, where all relevant personal information can be entered. If a non-member is selected, a modal will prompt the user to assign a responsible member for this request before proceeding to the "Personal Info" tab. The second tab, "Address," is dedicated to capturing detailed address information for the user. This structured approach ensures that all necessary information is captured efficiently and accurately, allowing for the seamless creation of new requests.
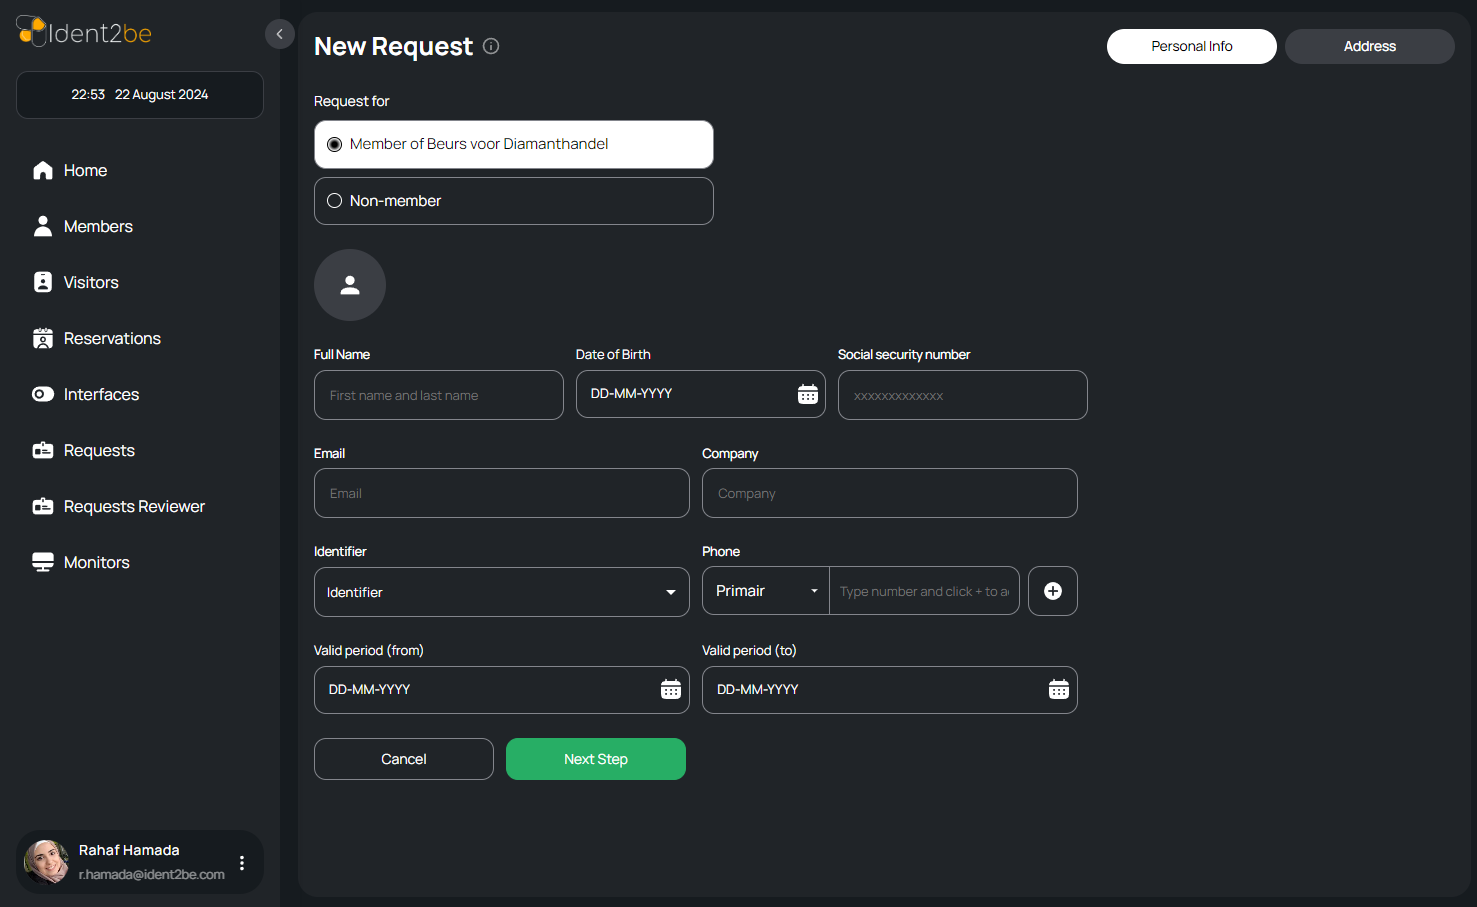
- Member Selection: When a user selects to create a request for a member, they are immediately redirected to the "Personal Info" tab. This streamlines the process by automatically presenting the user with the fields required to input relevant personal details.
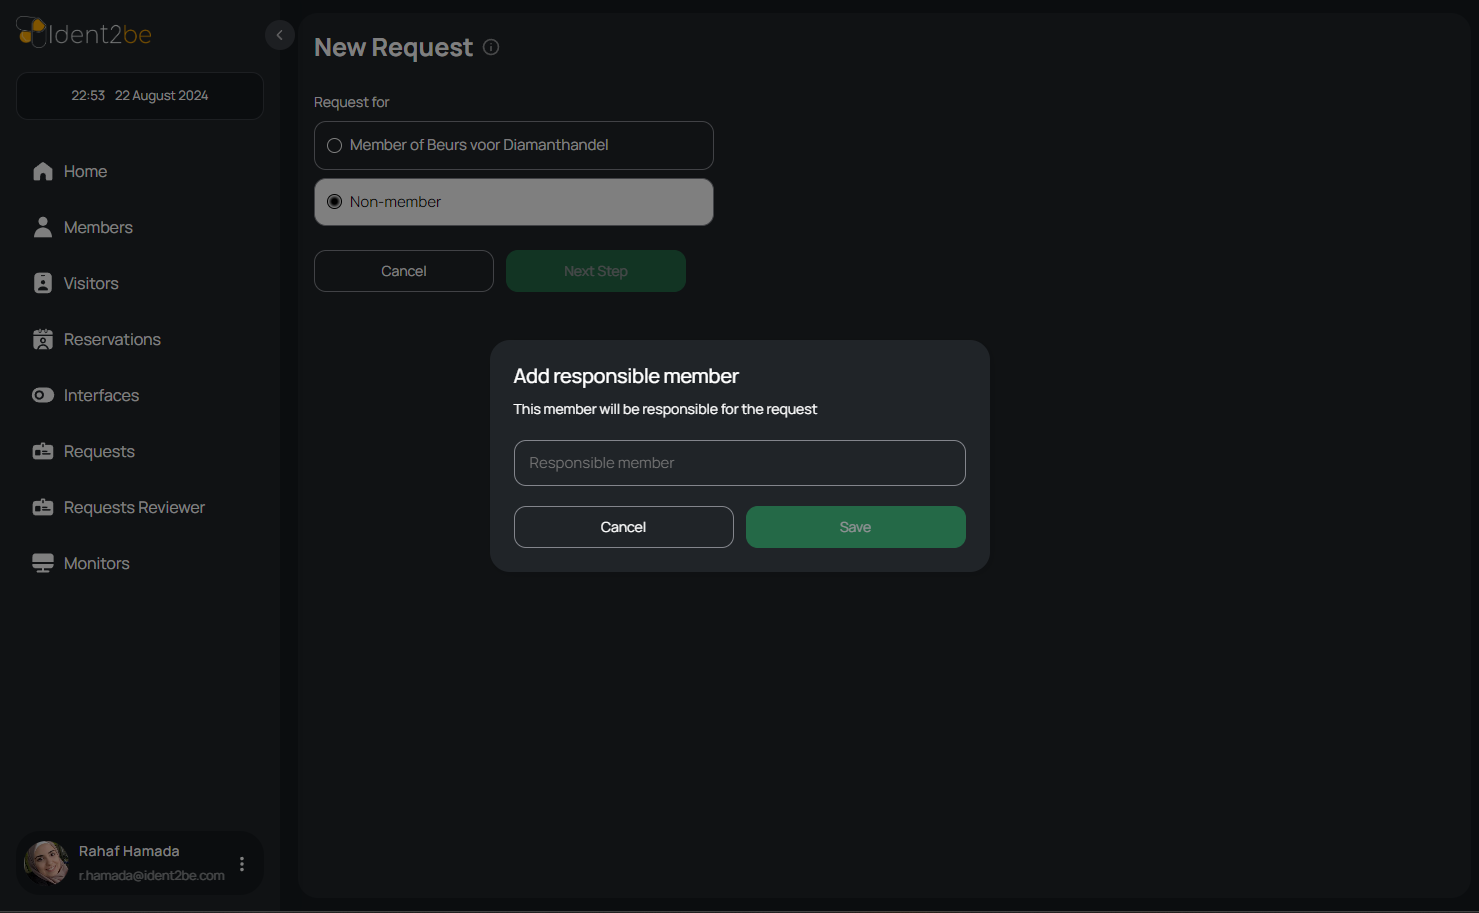
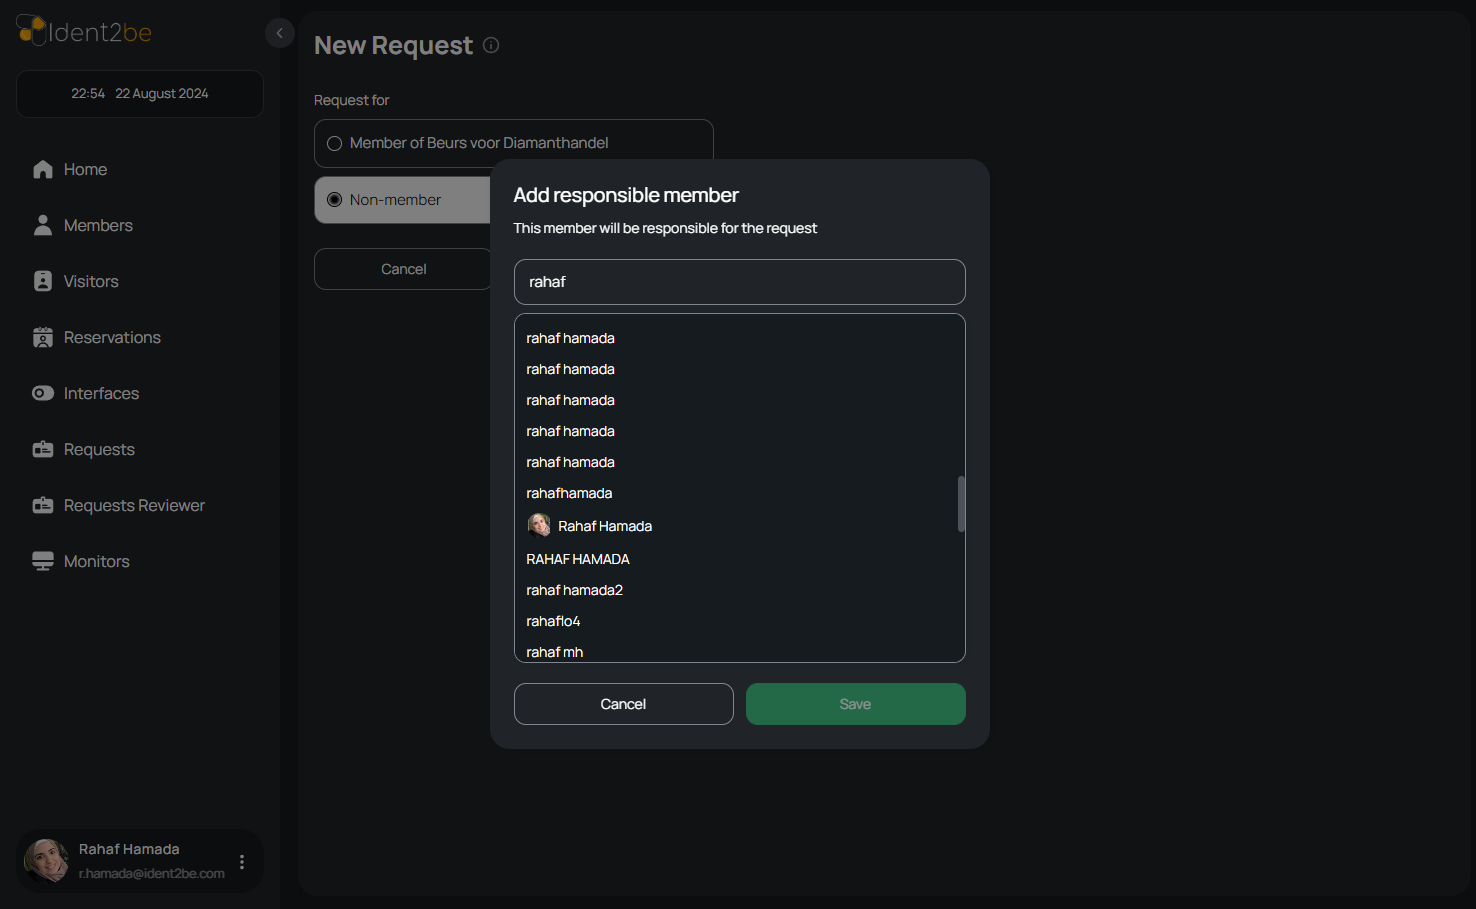
- Non-Member Selection: If a non-member is chosen, a modal will appear, prompting the user to enter the name of the responsible member who will oversee the request. Once the responsible member is assigned, the user is redirected to the "Personal Info" tab to continue entering the required details.
- Personal Info Tab: This tab contains fields to input the user’s essential personal details, including:
- Picture: An image field where the user’s picture can be uploaded.
- Name: A text field to enter the full name of the user.
- Email: A field for the user’s email address, ensuring accurate contact information.
- Phones: Input fields for one or more phone numbers, providing multiple contact options.
- Company: A field to specify the company the user is associated with, important for organizational records.
- Birthdate: A date picker for selecting the user’s birthdate, crucial for age verification and other uses.
- Request Dates (From, To): Date pickers to select the start and end dates for the request, allowing users to specify the time frame for the request.
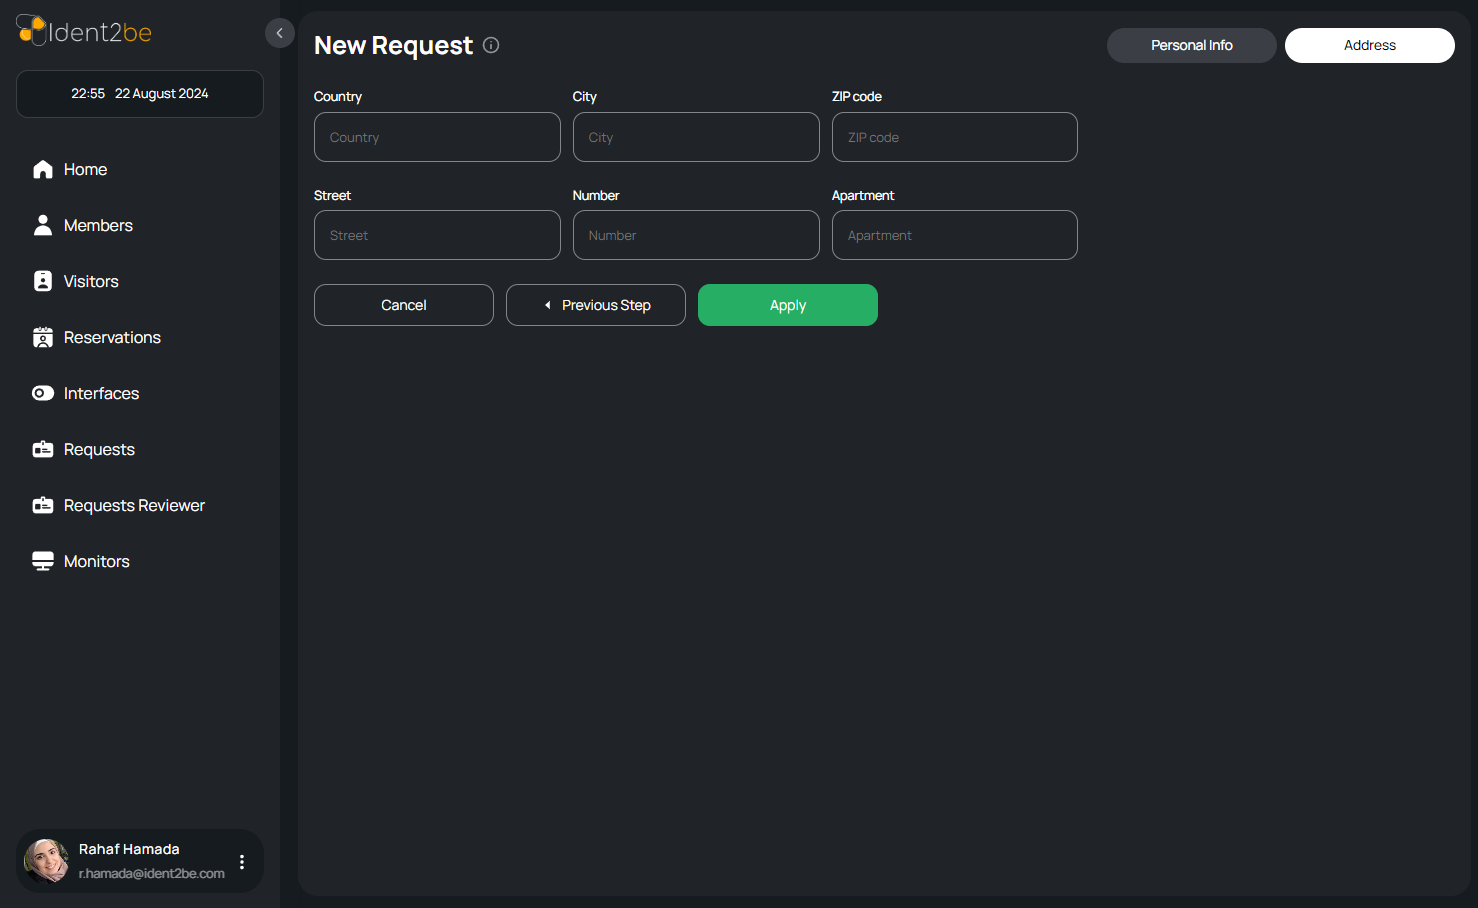
- Address Tab: The second tab focuses on the user’s address details. It includes fields for:
- Country: A dropdown or text field to specify the country of residence.
- City: A text field for entering the city name, providing more localized information.
- Zip Code: A field for the postal code, essential for precise location identification.
- Street: A field to enter the street name, a key part of the address.
- Number: A field for the building or house number, providing exact address details.
- Apartment: An optional field for the apartment number, allowing for additional location specificity.
- User Interaction: The New Request Page is designed to be intuitive, guiding the user through the process of creating a request with clear prompts and structured input fields. The use of tabs helps in organizing the information, making it easier for users to navigate and complete the request creation process.
How To Add New request
- Select Request Type : Choose whether the request is for a member or a non-member. If it's for a non-member, you must assign a responsible member for the request ,when you choose none member you will have pop up to select the responsible member ( (start typing the member's name to see matching results) .
- personal info Enter all the required personal information in this tab
- Address tab Enter the address information( not required ), then click "Apply" to complete the request.
Summary
The New Request Page facilitates the creation of requests for both members and non-members through a two-tab structure. It captures essential personal and address details, with additional prompts for non-members to assign a responsible member. The page is designed to ensure all necessary information is gathered efficiently.
